Dragon Age: Origins Walkthrough - Ostagar Side Quests

Your Own Mabari Hound
The one thing you should really do is head over to the kennels. This is a really good side quest. It’s easy to finish and you’ll either get your own Mabari or 20 silvers if you already have one as a Human Noble. The kennels should actually be marked with an exclamation point. The handler will ask you to muzzle a sick dog for him. Just say that you’ll give it a shot to enter the kennel. It’s then just a dialog choice to slap the muzzle on and start the treatment. He’ll give you the next part though. You need a special Wilds Flower that only grows out in the swamp. We’re heading out there later, so let’s start the quest now. Two birds with one stone. There’s a lot of them out there, just look for a white flower on a log. There’s one right after the first group of darkspawn on the trail.
If you didn’t talk to the kennel master, you can just pick one of the flowers. A human noble won’t be able to talk to him and get the quest, so this is the only way. Daveth will tell you that the kennel master wants it. We’ll drop it off once we go back to Duncan. The noble can get 20 silvers. Everyone else gets that Mabari later on in an event.
Signs of the Chasind
This is one of the large side quests in the Korcari Wilds. It’s great for XP, since you’ll explore most of the Wilds and kill a lot of darkspawn.
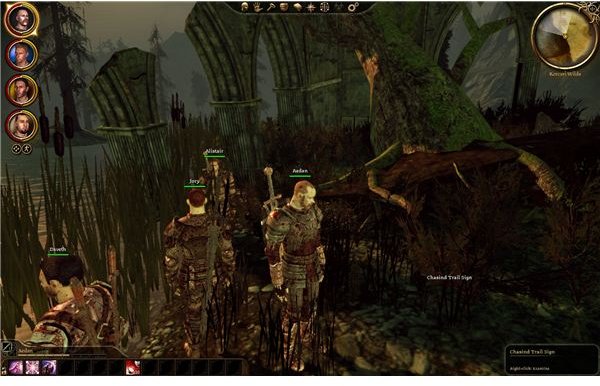
After you fight the first group of darkspawn, the path splits. The long path to the right will lead you into a very large darkspawn camp. It’s a tough struggle. You’ll need to just charge in with your warrior group and hope for the best. I only saw Alistair and Jory get knocked out, and I didn’t use any health potions. So just tough it out. Once they’re dead, search the bodies and then check the chest. You’ll find Rigby’s journal. It seems like he was searching for the Chasind Trail, so we’ll follow his notes. The next spot on the trail is marked on your map.
You need to walk up to the roots of the big rotten tree leaning on the ruins. Then you need to hold “Tab” to light up anything interactive. This seems like the only way to actually find the thing. Just keep moving around the roots until you find it. Activate the sign to get the next one. It’s actually back near the entrance to the camp, so go get it.
The 3rd sign is past the 1st. Just follow the path and take on the group of archers and the hurlock up ahead. They shouldn’t be a challenge, as long as a few melee guys distract the archers while another kills the hurlock. The marker should be just past them, near a group of darkspawn rogues.
The 4th sign is just a little further ahead. While you’re here, look ahead and toward the little rock path across the stream. This is another side quest for Jogby’s Stash. If you cross the river and kill the alpha wolf and his little pack, you can get some loot. You’re technically supposed to get the clue first, but we can do it now to save time.
The 5th sign is back in the middle, close to the first fork. Just curve to the left to get back to it. There are about 4 darkspawn guarding it, if you didn’t clear the area beforehand. It’s behind a wooden crate near the opened cage. The 6th one is further to the north, past Rigsby’s body and the large shrine. You should be able to see some wolves and darkspawn fighting it out. In fact, some of the rogues and the survivors will probably move down to attack.
The 7th is down by the bridge to the Archives. It’s to the far south. The marker is right next to the bridge with the Emissary. You’ll probably have to swing back and activate it after the fight is over. This is the last sign. The cache is ahead and to the right in the little camp. Just kill the 2 soldiers and the 4 rogues. Then activate the marked log to get a very nice cache of weapons and armor.
The Hungry Deserter
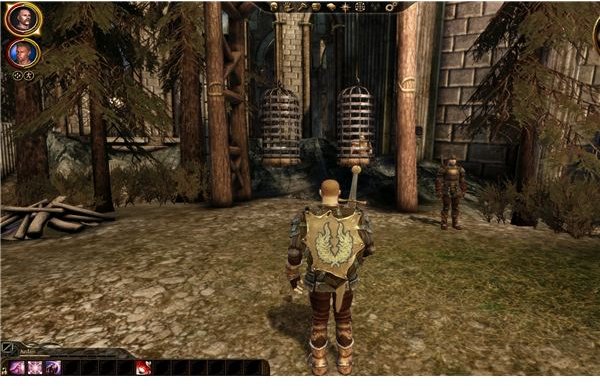
This one is available in the little lockup area by the infirmary. You can find a prisoner and his guard here. If you talk to the prisoner in the cage, you can find out that he wasn’t planning to desert. He was planning a big theft though, so he’s pretty much done for. He does want some food and water though. If you talk to him, he’ll offer up a key to the mages’ chest. You can get the food from his guard with a quick persuasion check or by just giving him 10 silvers. You can also use the speech option to kill him and take the key. The only noticeable difference is Alistair’s approval. You’ll get a +1 for giving him food and a -5 for killing him.
We can’t actually use it now. The relevant chest is being guarded by the Tranquil over in the mages’ camp. So we’ll swing by there once we get back from our quest. It will be dark. Just walk over to the spot by the quartermaster and open the chest.
Rigby’s Last Will and Testament
You should find this dead missionary by a shrine in the northeast. He’ll be in the middle of a battle between the wolves and the darkspawn. Kill off the survivors and search his body to find his last will and testament. The only thing he has to give is in a lockbox in his old camp. This is the large darkspawn camp to the west. It’s the right fork at the first split, and it’s the first stop for the Trail of the Chasinds (since we’re using Rigby’s notes for that anyway).
Just move on over. If you haven’t cleared it out yet, it’s a large darkspawn camp. Just charge in and focus on cutting down the soldiers. Make sure at least one guy goes after the archers, since that will split the group and disrupt their damaging fire arrows. The hidden cache in just below the firepit. Search it and make your decision. You can crack it open for the amulet, or hang onto it to carry out the last request. We’ll make it to Redcliffe later.
Jogby’s Stash
This one also goes by the term “The Missionary” but I like being a little more descriptive. It seems like the Korcari Wilds were tough on the missionaries who came through. You should find Jogby’s body near a shrine while you’re exploring the ruins. The wolves and the darkspawn both liked the area, so he was pretty much doomed. If you search him, you should find a letter detailing his secret stash with good clues on how to find it. If you can’t find his body, then it doesn’t matter. Just follow my instructions.
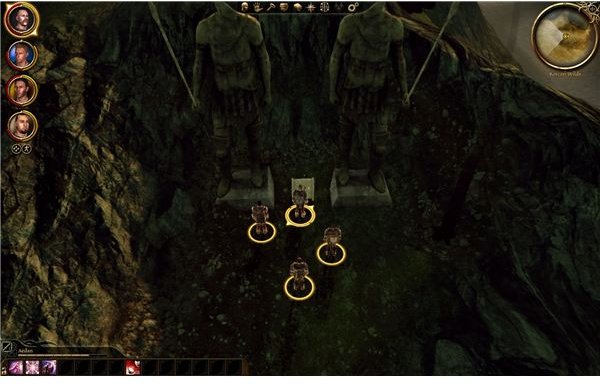
You can also just find it by accident. The letter isn’t even necessary. It isn’t hidden too well. If you go to the southwest corner of the map, you should see a ruin wall that forms a neat corner. There’s a large makeshift bridge formed by rocks. You should be able to see 2 large statues and a big wolf on the other side. If you cross the river, you’ll meet an alpha wolf and about 4 or 5 followers. Just focus on keeping the alpha wolf stunned and use some of your health potions if you have to use them. The normal wolves are weak, so they won’t be a problem once the big one dies.
The iron chest is your goal. It has a Chasind flatblade, which is a pretty nice 2 handed sword for the early game. That’s pretty much it.
A Pinch of Ashes
This is a quick one. You’ll get it by searching the bones of a dead soldier when you attack the darkspawn camping out by the archives. The bones should be right next to the first

bridge and the archers inside the camp. He has a bag of ashes and a notebook about mythology. It seems that there was a story about an earth spirit called Gazarath and he’ll grant a wish if you sprinkle ashes on his stone pile. The story also makes him sound reasonable and loving, right? This can’t go wrong.
Move along the left side of the camp up to the slopes. There’s a fairly obvious outcropping that is right next to the sunken dome. There’s also a pile of rocks. Activate it and then sprinkle the ashes across the rocks. It seems like Gazarath isn’t amused, since he’ll attack. Just gang up on him. He’s pretty tough, but he just won’t be able to stop all 4 of you. Just pound away and kill him. He should drop 2 bags. One is his personal armor, and the next bag of rags should have some boots or decent general equipment
This post is part of the series: Dragon Age: Origins - Ostagar Walkthrough
Our first big stop in Dragon Age: Origins is the army camp at Ostagar. These old ruins will give us the first series of side quests and our first big battles against the Darkspawn. We’ll have to get through the joining and then help the King’s army before we’re done.